

Troubleshooting a leaking marine valve is a critical skill for anyone involved in the maritime industry. As a marine valve supplier, I've seen firsthand the challenges that can arise when valves start to leak. In this blog post, I'll share some practical steps and insights on how to troubleshoot and resolve these issues effectively.
Understanding the Basics of Marine Valves
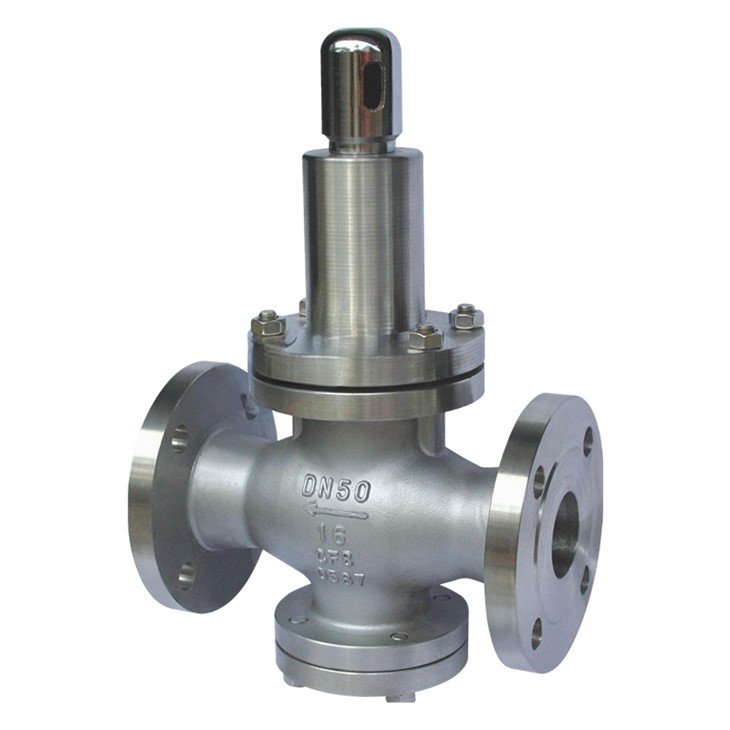
Before we dive into troubleshooting, it's essential to have a basic understanding of marine valves. Marine valves are used in various applications on ships, including controlling the flow of water, fuel, and other fluids. There are different types of marine valves, each designed for specific functions. For example, the Marine Storm Valve is used to prevent water from entering the ship during storms, while the Marine Pressure Reduction Valve regulates the pressure of fluids in the system. The Marine Butterfly Valve is commonly used for throttling and isolating flow.
Identifying the Leak
The first step in troubleshooting a leaking marine valve is to identify the source of the leak. This may seem obvious, but it can sometimes be challenging, especially in a complex ship system. Here are some methods you can use:
Visual Inspection
Start by visually inspecting the valve and its surrounding area. Look for signs of water, oil, or other fluids. Check the valve body, connections, and seals for any visible damage or wear. A cracked valve body or a loose connection can often be the cause of a leak.
Pressure Testing
If the leak is not visible, you can perform a pressure test. This involves pressurizing the system and monitoring the pressure to see if it drops. A significant drop in pressure indicates a leak. However, pressure testing should be done carefully, following the manufacturer's instructions and safety procedures.
Listening for Sounds
Sometimes, you can hear a leak. Listen for hissing or whistling sounds, which may indicate a small leak in the valve. This method is more effective for detecting leaks in high-pressure systems.
Common Causes of Leaking Marine Valves
Once you've identified the leak, the next step is to determine the cause. Here are some common causes of leaking marine valves:

Worn Seals
Seals are an essential part of a valve, as they prevent fluids from leaking out. Over time, seals can wear out due to friction, heat, and chemical exposure. If the seals are worn, they may no longer provide a tight seal, resulting in a leak.
Loose Connections
Valves are often connected to pipes or other components using bolts, nuts, or flanges. If these connections are loose, fluids can leak out. This can happen due to vibration, improper installation, or corrosion.
Corrosion
Marine environments are harsh, and valves are exposed to saltwater, which can cause corrosion. Corrosion can weaken the valve body and seals, leading to leaks. Regular maintenance and the use of corrosion-resistant materials can help prevent this problem.
Damaged Valve Body
A damaged valve body can also cause a leak. This can occur due to physical impact, excessive pressure, or manufacturing defects. If the valve body is damaged, it may need to be replaced.
Troubleshooting Steps
Once you've identified the cause of the leak, you can take the appropriate steps to fix it. Here are some troubleshooting steps for common causes:
Worn Seals
If the seals are worn, you can replace them. Start by shutting off the flow of fluid to the valve. Then, disassemble the valve and remove the old seals. Make sure to clean the valve body and the seal grooves thoroughly before installing the new seals. Use the correct type and size of seals, and follow the manufacturer's instructions for installation.
Loose Connections
If the connections are loose, you can tighten them. Use the appropriate tools, such as wrenches or socket sets, to tighten the bolts or nuts. However, be careful not to over-tighten, as this can damage the valve or the connections.
Corrosion
If corrosion is the cause of the leak, you can clean the valve and apply a corrosion-resistant coating. Start by removing any loose corrosion using a wire brush or sandpaper. Then, clean the valve with a suitable cleaning agent. After cleaning, apply a corrosion-resistant paint or coating to the valve body and connections.
Damaged Valve Body
If the valve body is damaged, it may need to be replaced. This is a more complex repair, and it's recommended to seek the assistance of a professional. Before replacing the valve, make sure to shut off the flow of fluid to the valve and relieve the pressure in the system.
Preventive Maintenance
Preventive maintenance is key to avoiding leaking marine valves. Here are some preventive maintenance tips:
Regular Inspections
Perform regular inspections of the valves and their surrounding area. Look for signs of wear, damage, or corrosion. Replace any worn or damaged parts before they cause a problem.
Lubrication
Lubricate the valve components regularly to reduce friction and wear. Use the correct type of lubricant, and follow the manufacturer's instructions for application.
Training
Provide training to your staff on how to operate and maintain the valves properly. This can help prevent improper use and installation, which can lead to leaks.
Conclusion
Troubleshooting a leaking marine valve requires a combination of knowledge, skills, and experience. By following the steps outlined in this blog post, you can effectively identify and fix the problem. Remember, preventive maintenance is essential to avoid future leaks. If you have any questions or need further assistance, don't hesitate to contact us. We're a leading marine valve supplier, and we're committed to providing high-quality products and excellent customer service. Whether you're looking for a Marine Storm Valve, a Marine Pressure Reduction Valve, or a Marine Butterfly Valve, we have the expertise and products to meet your needs. Contact us today to discuss your requirements and start a procurement negotiation.
References
- Shipboard Machinery Maintenance Manual
- Marine Valve Manufacturer's Catalogs
- Maritime Industry Standards and Guidelines